
Exporting
Turning your Markdown into a finished document.
The Export Drawer
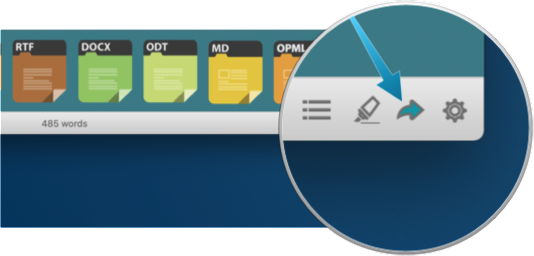
Pressing the Export button in the bottom right area of the window will open the Export Drawer, allowing you to quickly choose an export option without having to remember shortcuts for each one. The shortcut key to open the Export Drawer is ⇧⌘E.

The Export Drawer allows you to save your document as HTML, single-page PDF, paginated PDF, RTF package, or a Microsoft Word DOC or DOCX file. You can also save to a new Markdown file (Marked-specific features will be rendered and their results included), an Open Document (ODT), or as OPML for use in other applications.
Copy HTML
Use the Copy HTML feature to put the HTML source code for your preview into your clipboard without any hassle. You can select it from the gear menu, or just hit ⇧⌘C. The copied HTML will be a snippet ready for insertion into a blog, forum or HTML document.
You don’t need to be in the source view to copy. With the preview focused (click on it), just type ⇧⌘C and you’ll see a popup message letting you know that the source is in your clipboard.
Save HTML
The Save HTML command–accessible from the gear menu or by simply typing ⌘S–will allow you to save a full document ready for sharing or publishing.
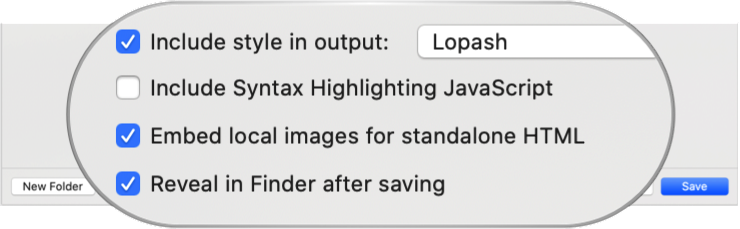
You can optionally include any of Marked’s styles (or one of your custom styles) in your export, giving you a ready-to-go document with necessary formatting already embedded.
Additionally, you can choose to embed any local images included in the document within the exported HTML, allowing you to have a standalone document that can be hosted anywhere without needing to move the images with it. This only works with images referenced on your local drive with relative or absolute paths. Avoid using file:/// paths if you want to make use of this feature.
Embedding styles with MultiMarkdown comes with a small caveat: if you have any metadata in the top of your document, MultiMarkdown 3 will render a complete document on its own and embedding styles will not be an option. You can, however, use the HTML Header metadata to include your own stylesheet. Checking Strip MMD3 Metadata in the will circumvent this issue, but your metadata will not be included in the final output.
Print/PDF
Print/PDF Preview (⌘P) will bring up a standard print dialog. Each preview style in Marked has its own accompanying print styles which remove backgrounds, modify type sizes and provide borders. The preview will print based on the currently-selected style.
Prominent on the print dialog box are the PDF and Preview buttons. PDF will give you a variety of options for exporting to PDF (based on your available applications) and Preview will export a PDF version directly to Preview.app where you can save or email it.
Printing to PDF using this method will include pagination. When printing to paper or PDF, page breaks may be inserted manually by using the <!--BREAK--> syntax or by setting options in the to use level one and/or level two headers as section dividers.
There is also a preference for turning horizontal rules (<hr>) into page breaks when printing. Doing so will replace the line created by the tag with a page break, removing it from the final output. The preview is unaffected by this setting.
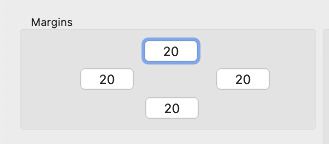
Page margins may be set in the and will affect Print and Paginated PDF output.
Headers and Footers
Headers and footers defined in the the will appear at the top and bottom of any page printed or saved to PDF. You can put any text in the upper left, upper right, lower left and lower right. The following variables will be replaced in the strings if used:
%title = Document Title
%date = Current Date
%time = Current Time
%page = Current Page Number
%total = Total Page Number
%path = Filesystem path to document
%filename = Just the filename of the document
%basename = The filename with no extension
%%(text) = Text to print only on the first page
%title will use any “Title:” info defined in MultiMarkdown Metadata headers, otherwise it will fall back to the filename without the file extension. To define a title using MMD Metadata, place the following on the first line of the document:
Title: The title of your document
Follow the line with a blank line (or any other Metadata you want to define, followed by a blank line).
You can also use any MMD Metadata key as a variable by prefixing it with %md_, and combining the key’s words as a lowercase string. For example, if your document has a metadata key at the top such as:
Funky Monkey: The funkiest monkey
Then using %md_funkymonkey in a header field would put “The funkiest monkey” into the exported document in that header’s location. Documents that do not contain that particular key will leave the field blank, allowing you to selectively add headers based on Metadata.
You can set a format for the date and time output using strftime tokens.
The “Page numbering offset” setting can be used to adjust what number the page numbers start at. For example, if you have a table of contents on the first page and want the numbering to start on the second page as page 1, set the offset to -1. Page 2 will now be page 1 in the header/footer (%page) and the total pages (%total) will be adjusted accordingly.
You can also specify a header/footer font for a specific document by using MMD metadata at the top of the file:
Header Font: Mensch
Note that if you use a font family name, a default fontface will be selected. You can specify a variation by using the system name of the font. For example, in the case of Helvetica Neue Ultralight, you would use “Header Font: HelveticaNeueUltralight”.
Additionally, you can specify a per-document header/footer font size with the metadata:
Header Font Size: 10
Per-Document Headers and Footers
You can specify headers and footers on a per-document basis using MultiMarkdown metadata at the very top of the document:
Print Header Left: %title
Print Header Right: %date
Print Footer Right: %page/%total
These will override any settings in preferences. Note that if you’re using a processor other than MultiMarkdown and don’t want your headers to show up in the document itself, you can use HTML comments, making sure you leave a blank line before the closing of the comment:
<!--
Print Header Left: %title
Print Header Right: %date

-->
Save PDF
This option saves your Preview directly to a PDF file on your drive. Your document will be rendered in its entirety, without page breaks. To include pagination in your output, use the Print/PDF options in the Export Drawer.
Other export options
Marked can export RTF (Rich Text Format) data directly to your clipboard. Just choose the Copy Rich Text command from the gear menu.
Marked can also save your file as an RTFD (Rich Text Format) file. The RTFD format is a bundle format that includes an RTF file and any images embedded in the document.
Other export options include DOCX and ODT formats, compatible with most word processing applications.
Next up: Layout and Typography ▶
Search | Support Site | Knowledgebase | Legal | Privacy | Twitter